
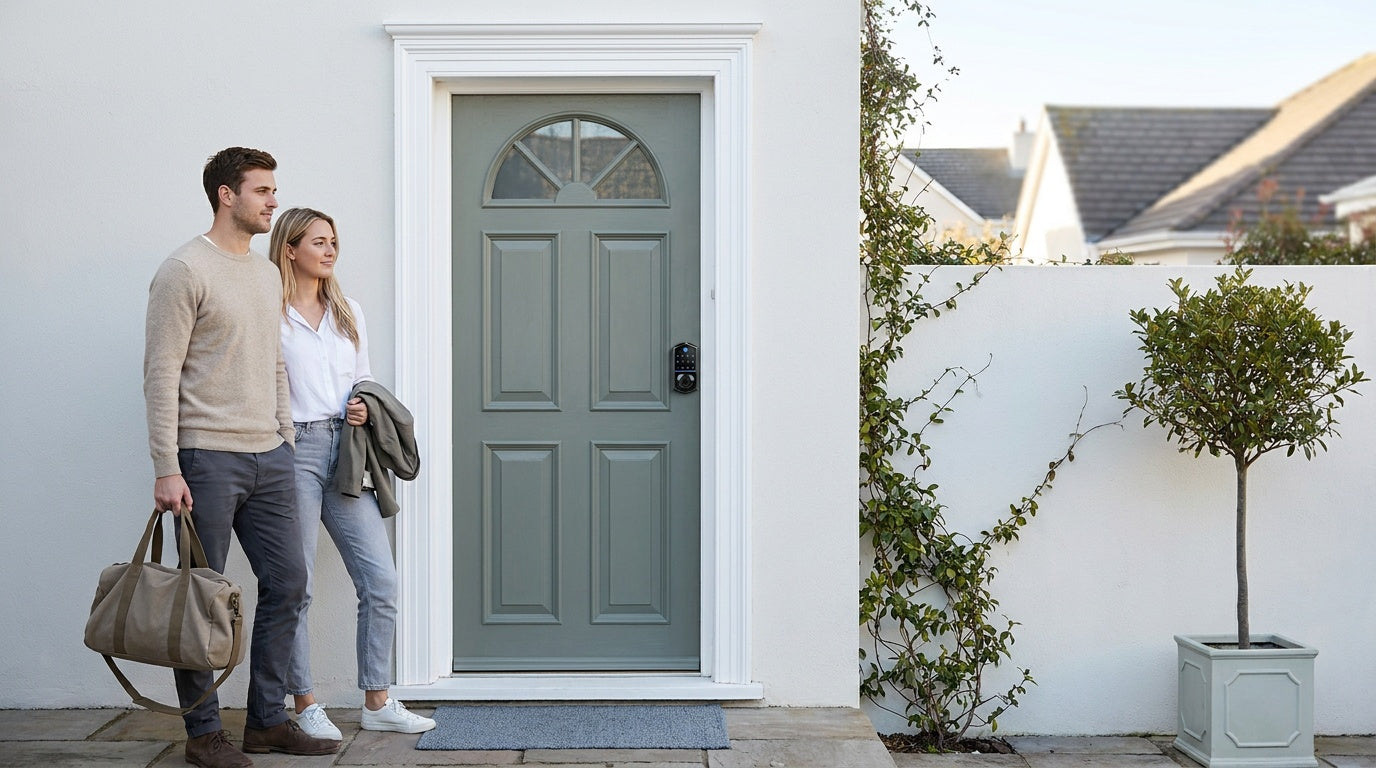
Picture this: it's 11 PM, your guest's flight landed two hours late, and they're finally pulling up to your short-term rental — exhausted and ready to drop their bags. Are you waiting on the porch in the dark, or are they already inside, code in hand, settling into a place they unlocked themselves? The second scenario is what Airbnb self check-in makes possible, and it's one of the simplest ways to transform how you host.
Self check-in lets guests access your property independently — no host meetup, no key handoff, no waiting around. For hosts managing one vacation cabin or several rental properties, it removes one of the most time-consuming and unpredictable parts of hosting: the arrival. The right setup means you reclaim your evenings, accommodate late-night arrivals effortlessly, and consistently earn the kind of five-star check-in reviews that keep your listing competitive.
This guide walks you through every step: from choosing the right entry hardware to enabling the feature inside your Airbnb dashboard, writing instructions guests actually follow, and keeping your property secure between stays. Whether you're setting up your first short-term rental or upgrading an existing one, you'll have everything you need to run contactless check-ins with confidence.
Why Self Check-In Is a Game-Changer for Airbnb Hosts
Self check-in has moved from a convenience to an expectation. According to Airbnb's own internal data, self check-in is one of the top 10 amenities guests search for on the platform — and listings that offer it appear in filtered results that many guests use exclusively. If your listing doesn't show the self check-in badge, you're invisible to a large portion of would-be bookers before they even read your description.
The practical benefits for hosts are just as compelling. You no longer need to coordinate your schedule around a guest's arrival window. Late-night check-ins, early flights, traffic delays — none of those become your problem at 10 PM. You simply prepare the property, share the code, and let the lock do its job. For hosts managing a short-term rental alongside a full-time job or family commitments, that freedom is substantial. Self check-in also scales: the same system that works for one property works for five, without adding five times the labor.
There's a security angle, too. A dedicated entry code for each stay helps prevent past guests from accessing your property after checkout. Smart locks with supported code types can automatically expire guest codes at checkout, so access ends when the stay does — no key retrieval required.
Step 1: Choose Your Entry Method
Airbnb recognizes several self check-in methods, and the right one depends on your property setup, your budget, and how much control you want over access. Here's an honest look at the main options:
- Lockbox (Key Safe): A wall-mounted or portable box that holds a physical key behind a combination code. It's the most budget-friendly starting point, but it has real limitations — you need to manually change the code between every guest, a jammed box can strand someone at midnight, and any guest who lingers near checkout knows the code. Best used as a backup rather than a primary access solution.
- Electronic Lock: A standalone electronic lock with a built-in keypad that replaces your existing door lock. Guests enter a numeric code directly on the door — no app, Wi-Fi, phone, or key required. Codes can be changed between stays with a few button presses. It’s a reliable, affordable option for hosts who want simple access control without remote features or subscription fees.
- Smart Lock (Gateway-Paired or Wi-Fi): A full lock replacement with remote management capabilities. You can manage guest access codes remotely, receive alerts, and review access activity from anywhere. For supported code types, codes can be set to expire automatically at checkout. This is a convenient, hands-off solution for short-term rental hosting once installed. Remote access requires a connected smart lock — either a gateway-paired or Wi-Fi model — rather than a standalone electronic keypad lock without connectivity.
- Building Staff / Front Desk: An option for apartment buildings with on-site staff. Works for some properties, but relies on third-party availability and can break down outside business hours.
For most short-term rental property owners, a smart lock or an electronic lock is the right call. The lockbox is a reasonable temporary fix or backup, but it's not the foundation of a reliable, repeatable check-in system. The rest of this guide focuses on the lock-based approach — the one that actually scales.
Step 2: Choose the Right Lock for Your Short-Term Rental
Choosing the right lock is the most important decision in your self check-in setup. The lock needs to be durable enough to handle frequent use by unfamiliar guests, easy enough for any guest to operate on the first try, and flexible enough to let you manage access remotely. Veise — Easy from Day One — builds its entire lock lineup on exactly those priorities, backed by Kaadas Group's 38 years of lock industry expertise and 711 patents, the world's largest smart lock patent portfolio.
Veise locks require full lock replacement rather than an overlay attachment, which means you're installing a properly engineered deadbolt or latch built from the ground up as a smart lock — not retrofitting a motor onto an old lock body. That matters for long-term durability at a rental property. All Veise locks are compatible with wood doors (standard thickness 1-3/8" to 2"), ANSI/BHMA Grade 3 certified as the residential standard, and designed for straightforward DIY installation with a screwdriver in about 15 minutes. Here's how the four main lock categories match up for short-term rental use:
Keypad Deadbolt — Reliable Standalone Entry
A Keypad Deadbolt is an excellent entry point for hosts who want dependable keyless access without app complexity. Every model includes keypad code entry and a physical key backup — so if a guest ever forgets the code or the battery runs low, they're not stranded. The KS02 series adds fingerprint recognition on every SKU, scanning in under 0.3 seconds — a touch-to-enter option for frequent visitors like cleaners or property managers. Codes can be changed between stays manually, and One-Time codes (supported on every Veise lock, including electronic lock categories) delete themselves after a single use, which is handy for a one-off contractor visit. Anti-peep entry also lets a guest pad the real PIN with extra digits so onlookers can't read it off the keypad. Sitting at the accessible end of Veise's $30–$180 lineup, this is an affordable, no-subscription path to self check-in.
Wi-Fi Smart Lock — Remote Control from Anywhere
If you're managing a rental property from a distance or simply want full visibility into who's entering your home and when, a Wi-Fi Smart Lock is the most capable option in the Veise lineup. It connects directly to your home's Wi-Fi and lets you control access remotely via app, set up voice commands through Alexa or Google Assistant, and receive entry alerts whenever someone uses the lock. All models include keypad code entry, app control, fingerprint recognition, and a physical key backup. Key fob support splits by series: the VE027 series has it on every model, and the VE012W series does not support key fob at all.
Veise's Wi-Fi Smart Lock uses 8 AA/LR6 alkaline batteries instead of the more common 4 AA setup, which delivers a stronger signal and a more stable connection. The keypad code and physical key work regardless of connectivity, and on both Smart Lock w/ Gateway 1/2 and Wi-Fi smart locks app control also continues to work locally when Wi-Fi is down, as long as you're within short-range wireless distance. Veise offers two Wi-Fi series: the Touchscreen Wi-Fi Smart Lock (VE027 Series), which features a touchscreen interface and includes a USB-C emergency power port on every SKU in the series for lockout peace of mind, and the Push-Button Wi-Fi Smart Lock (VE012W Series), which uses a traditional press-button keypad. The two series differ in four concrete ways: interface (touchscreen vs press-button), USB-C emergency power, key fob support, and on-device voice prompts in English, Spanish, and French — all three of the latter are VE027 series only.
Smart Lock w/ Gateway 1/2 — Connected Access with Gateway Flexibility
Smart Locks w/ G1 and Smart Locks w/ G2 connect to the Internet through a paired gateway hub, giving you remote app control, entry alerts, and voice assistant integration without built-in Wi-Fi in the lock itself. Both lines include multiple unlock methods: keypad code, key fob, physical key, and remote app via the paired gateway — making them well-suited for rental properties where guests or cleaners may need varied access options.
The Smart Lock w/ G1 is built on a single product series, the VE017 — every model ships with multilingual voice prompts (English, Spanish, and French), a USB-C emergency power port, and fingerprint as standard. It pairs with a Veise-developed first-party app, which means a more seamless management experience. That makes Smart Lock w/ G1 the most reliable all-in-one connected pick for most short-term rental hosts. Smart Lock w/ G2 offers more SKU variety — including non-fingerprint options and both standalone and handleset bundle form factors — and adds Apple Watch unlock and web portal control, which can be a convenient feature for tech-forward hosts who manage access from their wrist. On both lines the gateway is a separate device, sold separately on nearly all SKUs, and it needs to sit within wireless range of the lock while reaching your home network.
Keypad Latch Lock — Interior and Side Door Access
The Keypad Latch Lock is an integrated unit with the handle built into the lock body — available in a top-knob version (KS03) or a top-lever version (KS04). It's commonly a fit for interior doors, side entrances, garage access doors, or any secondary entry point at a rental property. It supports keypad code and physical key only, with no app control. If you're looking to secure a main entry door at a rental, a deadbolt or smart lock is typically the stronger choice.
Step 3: Install Your Lock
One of the biggest barriers hosts cite before upgrading a rental property's entry system is installation complexity. The Effortless Home Improvement™ Experience is exactly what Veise is built around: install completes in about 15 minutes with a screwdriver, no wiring, no electrician, no professional help required. Because Veise is a full lock replacement (not an overlay), you're working with the standard hole pattern already cut in your wood door — remove the old lock, align the new hardware, tighten the screws, and you're done.
Every Veise lock ships with a preset default master code from the factory, allowing you to lock and unlock right away after installation to confirm the setup. Before use, update the default master code and create your own PINs according to your lock model’s programming instructions. On connected locks, you can also manage codes through the app after pairing the lock with your gateway or Wi-Fi network. Always run a live test — step outside, close the door fully, and confirm the code works as expected before your first guest arrival.
Step 4: Enable Self Check-In on Your Airbnb Listing
With your lock installed and tested, the next step is telling Airbnb — and your guests — that self check-in is available. Here's how to update your listing:
- Log in to Airbnb.com and navigate to Your Listings. Select the property you're updating.
- Go to Listing Details and scroll to the Guest Resources or Arrival Guide section (the exact label may vary slightly by interface version).
- Click Edit next to Check-In and select your check-in method — Smart Lock, Keypad, or Lockbox depending on your hardware.
- Complete your Check-In Instructions — this is the step-by-step guide guests will receive. Cover the property address, parking, door location, access code, and Wi-Fi details. Add photos for each step where possible.
- Save your changes. Airbnb will automatically release your detailed check-in instructions to guests 48 hours before their arrival and display a self check-in badge on your listing in search results.
That self check-in badge is more than cosmetic — guests actively filter listings by it. Enabling the feature puts you in front of a larger pool of travelers who have already decided they want a contactless arrival. It's one of the lowest-effort listing upgrades available, and the hardware you've already installed makes it possible.
Step 5: Write Clear Guest Check-In Instructions
The lock is only half the equation. Clear, complete instructions are what actually get guests inside without a panicked call to you. Remember that Airbnb releases detailed instructions 48 hours before arrival, and most guests read them on a small phone screen, often on the day they arrive. Write as if you're guiding a stranger who has never visited the property and has no context beyond what you give them.
Strong check-in instructions cover every handoff point between the road and the front door. A complete set typically includes:
- The full property address with any clarifying notes (e.g., "park in the driveway, not the street")
- Which entrance to use and how to find it (a photo of the front door works better than words alone)
- The exact entry code and step-by-step instructions for using the keypad or lock
- Any gate codes, building access steps, or elevator PINs that apply
- Wi-Fi network name and password
- Your contact number for emergencies
Beyond the Airbnb platform's built-in instructions, most experienced hosts also send a personal pre-arrival message 24 to 48 hours before check-in that repeats the code and key details. Guests who receive the information twice are far less likely to get stuck at the door. Keep the message concise — a wall of text is easy to skip. Bullet points, short sentences, and a photo of the door go a long way.
Step 6: Manage Access Codes Between Stays
A single static code shared with every guest is one of the most common and easily avoided security gaps in short-term rental operations. Previous guests could still have access if the same code remains active. Smart locks help solve this by allowing hosts to create unique codes for each reservation and manage guest access more securely. For supported code types, codes can be set to expire automatically at checkout. With a Wi-Fi Smart Lock or a gateway-paired smart lock, you can create, adjust, and delete guest codes remotely from anywhere with an Internet connection — no trip to the property required.
For electronic locks without remote access, build code management into your turnover checklist. Delete guest codes after every checkout, the same way you change the linens. It takes about a minute and it's the single most important security habit for any rental property relying on fixed codes. Also keep a backup plan in place: a secondary lockbox with a spare key stored offsite, or a trusted local contact who can respond within 30 minutes in a genuine emergency. Even the best lock benefits from a human backup when technology behaves unexpectedly.
Best Practices for a Smooth Self Check-In Experience
The difference between a seamless guest arrival and a middle-of-the-night support call usually comes down to a few small details that hosts overlook after the initial setup. These practices take minutes to implement and protect the experience you've worked to build:
- Light the entrance. An outdoor light on a timer or motion sensor ensures guests arriving after dark can find the door and read the keypad. This is especially important at rural properties or vacation cabins where exterior lighting isn't automatic.
- Test the lock regularly. Add a periodic code test to your property maintenance routine — especially after power outages or battery changes. A lock that worked perfectly at installation can develop issues months later without any obvious warning signs.
- Monitor battery levels. Set a calendar reminder to check and replace batteries proactively before they get critically low. Low batteries are the most common cause of self check-in failures — and they almost always happen at the worst possible time.
- Use auto lock. Configure your lock's auto lock feature so it re-engages on its own after each entry — configurable between 10 and 99 seconds on Keypad Deadbolt and Keypad Latch locks, and between 10 and 180 seconds on connected models. One thing to make clear in your check-in instructions: the interval is a timer, not a door sensor, so guests should pull the door shut behind them rather than assume the lock waits for it.
- Vet guests through the platform. Self check-in removes the in-person assessment that comes with meeting guests at the door. Review guest profiles, check past host reviews, and ask a brief question about the purpose of the stay before confirming a booking — especially for new accounts without a review history.
- Send a follow-up the morning after arrival. A brief message checking in after the first night catches any small issues before they compound into a negative review. Keep it friendly and short — it signals attentiveness without being intrusive.
Frequently Asked Questions
Do I need a smart lock for Airbnb self check-in?
No — an electronic lock or even a lockbox qualifies as a self check-in method on Airbnb. However, a smart lock offers more flexibility: compatible models can support unique codes per reservation, remote code management, and access monitoring. For a single rental property, a keypad lock is a practical and affordable starting point. For multiple properties or remote hosting, a smart lock with remote access features is a more scalable solution.
Will enabling self check-in improve my listing's visibility on Airbnb?
Yes. Airbnb officially states that adding a check-in method like a smart lock can help your listing stand out, and guests frequently filter search results for listings that offer self check-in. Enabling the feature adds a self check-in badge to your listing that appears in filtered search results, putting you in front of guests who have specifically requested a contactless arrival.
When do guests receive their check-in instructions on Airbnb?
Airbnb automatically releases your detailed check-in instructions to guests 48 hours before their scheduled check-in. Because that's a relatively short window, most experienced hosts also send a personal message with the key details — entry code, address notes, parking — on the day of arrival or the evening before. Guests who receive the information twice are far less likely to encounter problems at the door.
How do I keep my rental property secure with self check-in?
The most important security habit is using a unique access code for every reservation and removing or updating access after checkout. Smart locks make code management easier, while electronic locks without remote access require manual changes between stays. It's also worth reviewing guest profiles before confirming bookings and keeping a backup access option (such as a spare key with a trusted local contact) in place for genuine emergencies. The goal is layers: a strong lock, well-managed codes, and a human fallback when needed.
Are Veise smart locks compatible with any door?
Veise locks are compatible with wood doors in standard thicknesses from 1-3/8" to 2". They are not compatible with fiberglass, metal, storm, or sliding doors. If your rental property has a wood exterior door in standard thickness, installation takes about 15 minutes with a screwdriver and no wiring — straightforward enough for any property owner to complete before the next guest arrives.
Can I use a Veise electronic lock with a gateway for remote access?
No — remote access requires a smart lock (gateway-paired or Wi-Fi), not an electronic lock. A keypad deadbolt or keypad latch lock cannot be paired with a gateway to gain remote capabilities. If remote access, app control, and entry alerts are priorities for managing your rental property, look at the Wi-Fi Smart Lock or Smart Lock w/ G1 / Smart Lock w/ G2 lines instead.
What happens if the Wi-Fi goes down at my rental property?
With Veise's Wi-Fi Smart Lock or gateway-paired smart lock, even when Wi-Fi is down, app control continues to work locally as long as you're within short-range wireless distance of the lock. Guests can still use the keypad code and physical key backup at any time, regardless of Internet connectivity. Long-distance remote features — like off-site access management and entry alerts — do require an active Internet connection.
Self check-in is one of the most practical upgrades any short-term rental property owner can make. It removes the coordination burden of in-person arrivals, accommodates guests on any schedule, boosts your listing's visibility in Airbnb search results, and makes your property more secure when paired with rotating access codes. The key is building the system on reliable hardware — because everything else in the guest experience rests on whether the door opens the first time a guest tries it.
Veise smart locks and keypad locks are built for exactly this kind of everyday reliability. With 38 years of lock industry expertise behind every product, a 15-minute installation process, no subscription fees, and multiple unlock methods to suit any guest scenario, they're a practical, affordable foundation for a professional self check-in setup. Browse the full Veise lineup under All Products to find the right fit for your rental property.
Ready to Set Up Self Check-In at Your Rental Property?
Not sure which Veise lock is the best fit for your short-term rental? Our team is happy to help you choose. Easy from Day One.
Contact Us

Leave a comment
This site is protected by hCaptcha and the hCaptcha Privacy Policy and Terms of Service apply.